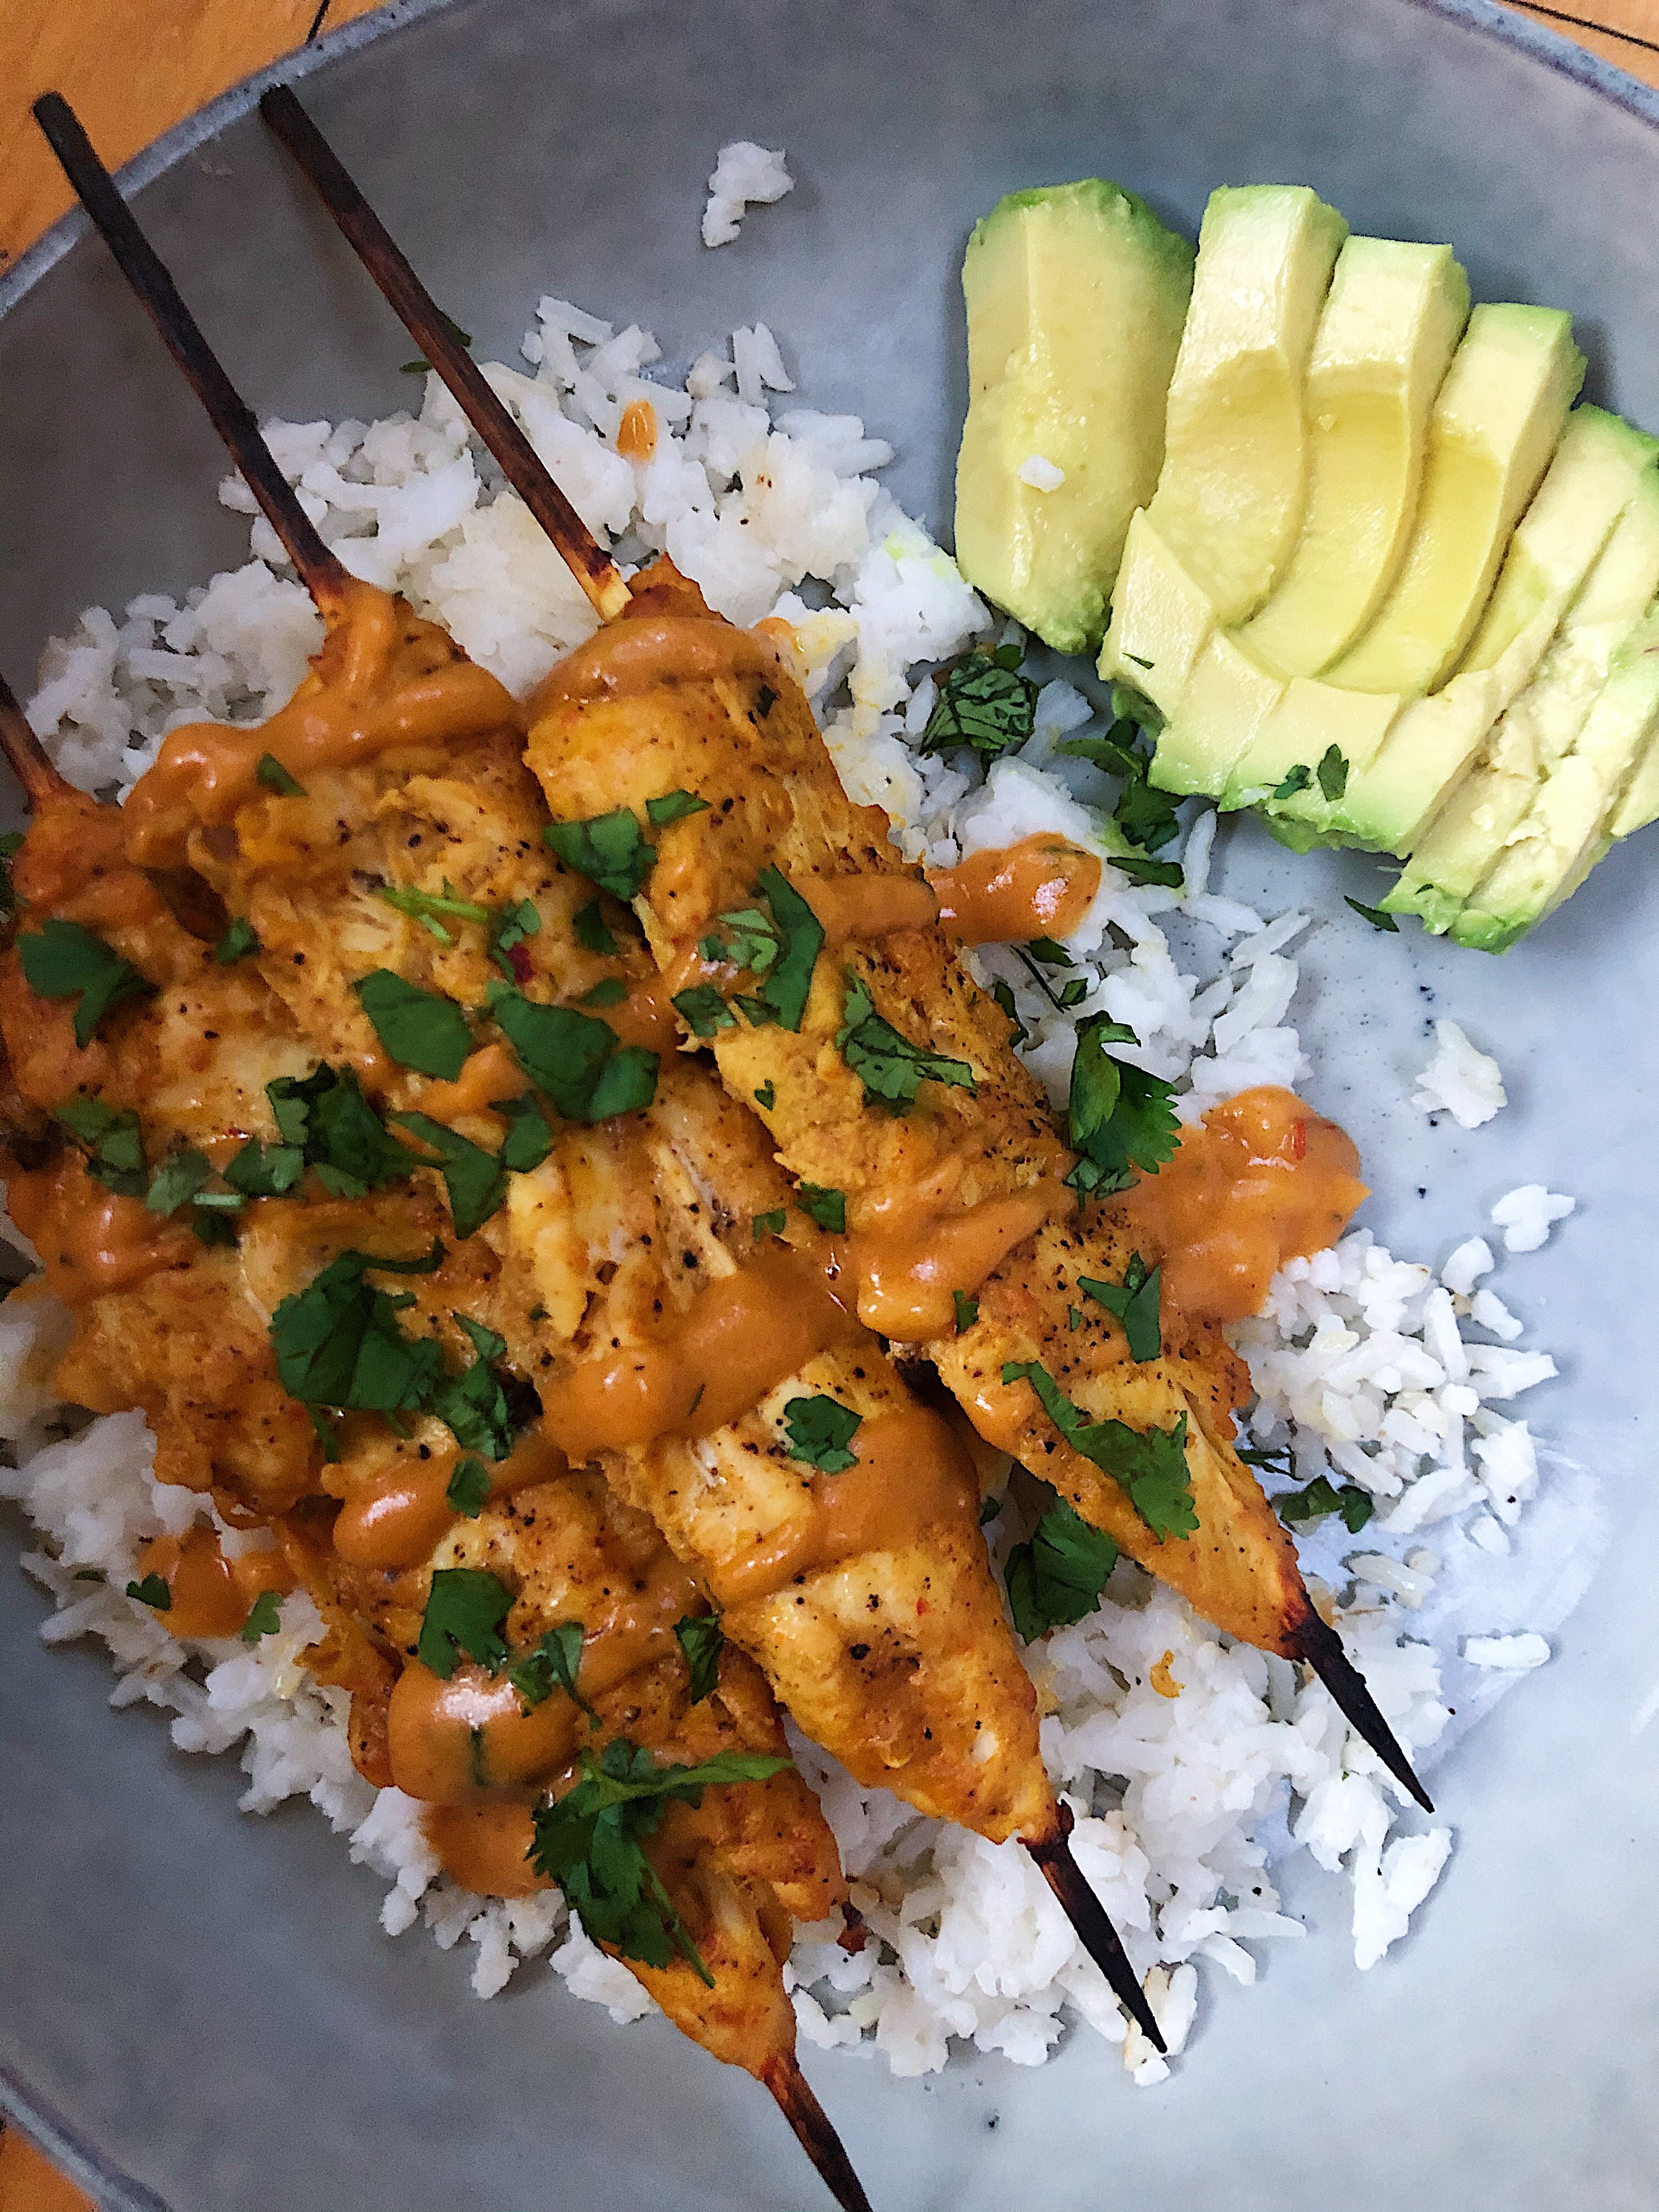
Peanut Chicken Satay Skewers

I am definitely missing Asian and Indian cuisine from my favorite local spots since this whole global pandemic. I’ve been trying to only cook at home during this wild time to limit outings and make the most of my pantry— so I’m finding creative ways to fulfill the cravings with what’s on hand! While these juicy peanut chicken skewers would be fabulous grilled, I am limited to what’s in my kitchen arsenal so I’ll be sharing my baked version of this savory, flavor-packed take on chicken satay. I’m going to be serving them over a bed of leftover white rice from earlier this week with some avocado on the side to help use up what’s about to go bad. They would be just fine on their own or over a bed of lettuce, or alongside mixed stir-fried veggies, get creative with what you have!

INGREDIENTS:

  • 1 lb chicken tenderloins (or breasts tenderized and cut into thin strips)
  • 1 tbsp sesame oil (coconut or olive work too)
  • 1/2 cup peanut butter
  • 3 tbsp soy sauce
  • 1 tbsp red curry paste (any kind of garlic chile paste/oil or even sweet chili sauce can be used, it won’t have the same umami flavor but it will add a nice component to the sauce)
  • 1 tbsp brown sugar
  • 1 tbsp fish sauce
  • 1 can coconut milk
  • 2 cloves garlic
  • 1 tbsp minced ginger
  • 1 lime
  • Cilantro (optional)
  • Bamboo skewers

Seasonings: turmeric, curry powder, dried basil, cumin, cayenne, salt & pepper

Cooking Instructions:

To start take out your chicken breast tenderloins from the package, give them a good rinse and pat dry. in a wide bowl or shallow platter, drizzle them with a tablespoon of sesame oil. Next, season them with ground turmeric, curry powder, dried basil, cumin, cayenne or crushed red pepper and salt & pepper, making sure they’re evenly coated. I always eyeball my spices rather than measuring them out, if you really like to stick to specifics, I’d recommend about 1-2 teaspoons of each. Set aside.

While your chicken is soaking up that beautiful blend of earthy and tangy spices, you’re going to mix up your peanut sauce that will act as your marinade and also your extra sauce for dipping once your chicken is cooked. To start, grab a small pot or skillet and turn your heat to medium-high. First add in a bit of sesame oil and let it heat up, then add in your minced garlic and ginger. If you have fresh on hand that’s awesome, dice it up nice and fine, otherwise grab your jar of refrigerated pre-diced garlic and ginger (or paste from a tube if that’s what you have.) Next, add in your curry paste and whisk it all together for a couple of minutes. Follow with a can of coconut milk and the peanut butter.

I like to let these ingredients fully melt and come together before I add anything else to achieve a really nice and smooth texture. Once all of your PB is melted and there are no clumps, go ahead and add in your soy sauce, fish sauce, lime juice, and brown sugar. Whisk this for a few minutes and let it come to boil so it can thicken up a bit. I then like to add in a pinch of all the seasonings you used on your chicken, to really help enhance and carry over that same flavor, as well as a tablespoon of chopped cilantro. Once your peanut sauce is thick enough to coat a spoon and slowly drizzle off, remove it from heat. Let it cool a bit and then pour a generous amount over your chicken (you’ll want to reserve the rest in a small container for later.)

For best results you should let this mixture marinate overnight to really tenderize and flavor the meat, at the very least give it 3-4 hours if you can’t make it overnight! While those are marinating place your bamboo skewers in a shallow dish of water, ( for at least one hour) this will prevent the wood from burning while your chicken cooks.

Once your chicken is marinated fully, remove each strip from the marinade making sure to let any excess thoroughly drip off. This is why it’s best to marinate them for as close to 24 hours as possible, you want a good amount of the mixture to have absorbed into the meat, not have it dripping off of it when you place in on your baking sheet. Too much liquid on the meat while it’s cooking in the oven will cause it to steam and have a rubbery texture rather than a slightly crisp outside we’re going for.

Preheat your oven to 400 degrees and then go ahead and carefully pierce each piece onto a pre-soaked skewer and place on your baking sheet. Once they’re all assembled, place your baking sheet on the top rack of the oven, and cook for approx 15-20 minutes (depending on thickness) flipping once in the middle. I like to turn on the broiler for the last couple minutes to really achieve that slightly crispy outer texture!

During the last couple minutes of cooking, grab your reserved sauce and warm it up a bit, placing in a dish easy for dipping or drizzling!

Remove your chicken from the oven and place your tender, juicy skewers over a bed of rice, lettuce or just on their own, but make sure to drizzle them with extra sauce and sprinkle them with some freshly chopped cilantro (green onion work great too if you’re not a cilantro fan) ENJOY!
Shrimp Fried Rice

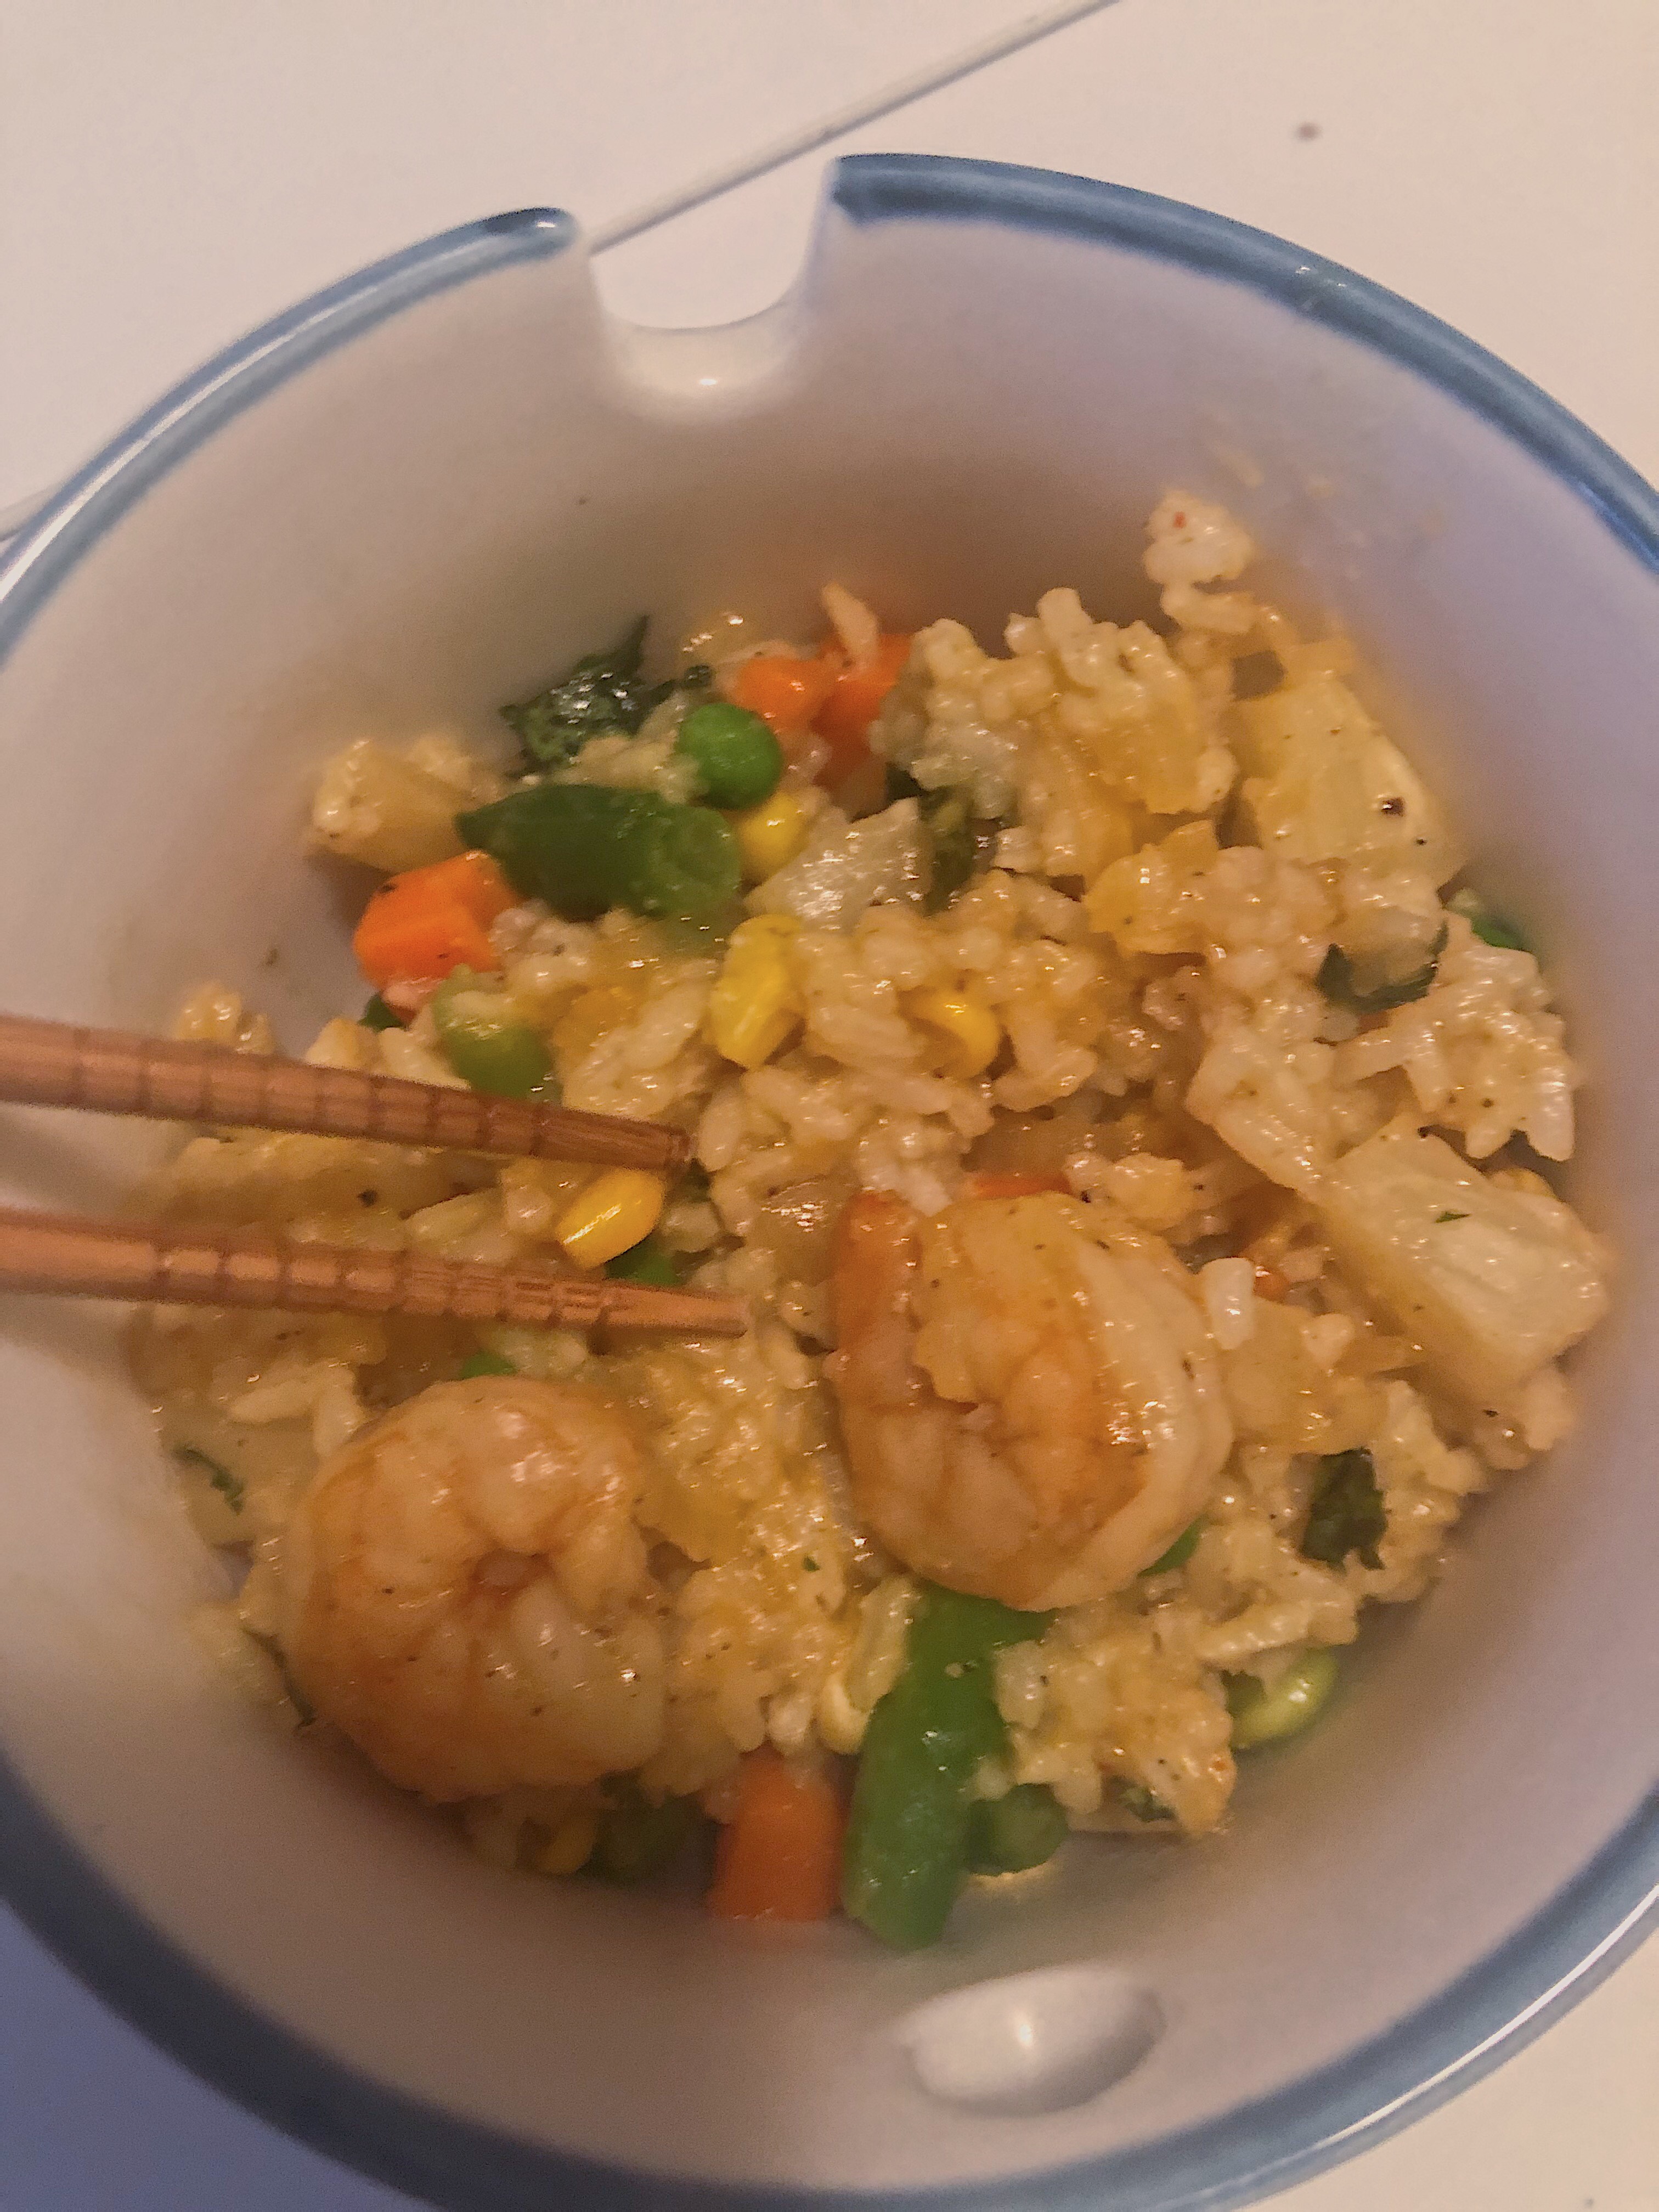
This recipe is hella quarantine friendly amidst this COVID-19 craziness. If you don’t keep frozen shrimp on hand like I do, you can sub for chicken or omit it all and keep it veg friendly. All the flavors of your favorite takeout without having to leave the house and made with pantry staples.

INGREDIENTS:

  • 1/2 fresh or frozen shrimp
  • 2 cups frozen veggie medley (peas, corn, carrots)
  • 1 small onion
  • 2 cups white or brown rice
  • 1 small can pineapple chunks
  • 2 cloves garlic
  • 1 tbsp minced ginger
  • 2 tbsp Thai or Italian basil (optional)
  • 3 tbsp soy sauce
  • 1 tsp fish sauce
  • 1 tbsp Sriracha
  • 1 tsp sugar

Spices: Turmeric, crushed red pepper, slat/pepper

Thaw, devine and remove shell/tail from your shrimp to start. Give them a quick rinse and pat dry. Next, in a small bowl, give them a good coating of olive oil and season with a bit of salt & pepper, turmeric and crushed red pepper. Set aside.

While your shrimp are marinating, cook your rice according to the package. Or, just follow the 2:1 ratio, brining two cups of rice to a boil with approx. 4 cups of water. Once it’s boiling, reduce heat to medium and let it simmer until all the water evaporates, making sure not to lift the lid and let any steam escape. (This will take 15-20 minutes)

While your rice is cooking, dice up your onion and up your fresh ginger and garlic. If you don’t have fresh, the jarred minced ginger/garlic or the paste variety also work great and keep in your fridge for much longer than the fresh kind. (Definitely helpful during a global pandemic)

Next, combine fish sauce, soy sauce, sriracha, sugar, and a pinch of salt and pepper in a small bowl. Whisk to combine and set aside.

Add a few tablespoons of oil to a hot skillet (sesame works best flavor-wise for this recipe but coconut, olive, or vegetable oil will work just fine.) Add in your onion and sauté for 5 minutes until softened then add in your garlic and ginger and stir for another couple of minutes. Make room in the middle of your skillet and add in your shrimp. Let them sizzle for a couple minutes on each side, making sure they are nice and pink in color. Next add in your frozen veggies and pineapple, continuing to saute everything together for another couple minutes.

Make another small space in the center of your skillet and crack your egg into it. Gently scramble until it starts to set and toss with all your other ingredients. Lastly, fluff your rice with a fork and add into you skillet, pouring your sauce over. Give everything a few good tosses to make sure everything is combined and evenly coated.

I like to top mine off with a bit of fresh basil and a little extra sriracha drizzle. Grab a pair of chopsticks, and enjoy!

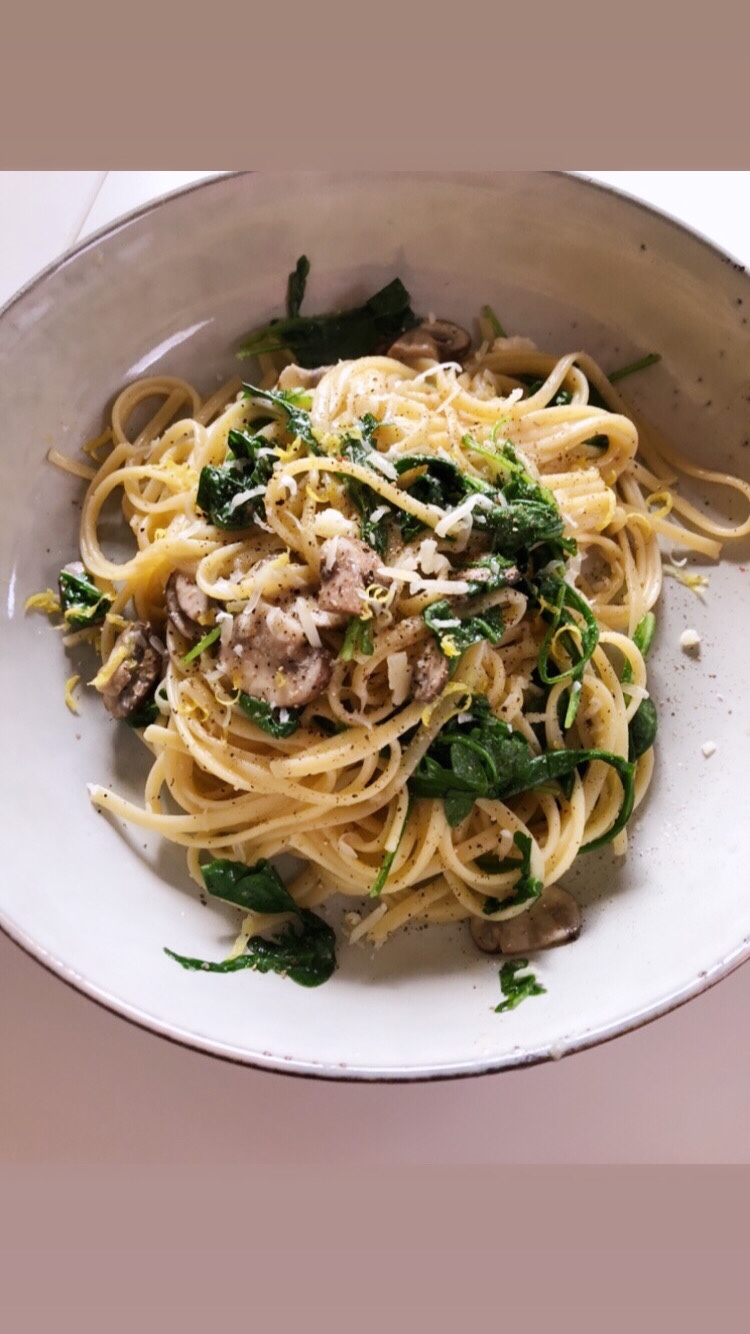
Cacio e Pepe

This dish is a perfect combination of pantry staples and fresh produce. It comes together quickly but what it lacks in complexity it makes up for in flavor, my personal favorite comfort pasta dish.

INGREDIENTS:

  • 1/2 package spaghetti
  • 1 cup white wine
  • 2 cups fresh arugula
  • 2 cups baby bella mushrooms
  • 1 lemon
  • 2 cloves garlic
  • 1/2 cup grated pecorino/parmesean cheese
  • salt/pepper
  • parsley (optional)

Bring a large pot of water to a boil and add a hefty sprinkling of salt, this will help season the pasta. Cook 10 minutes, just about al dente but not quite.

While your pasta is boiling, rinse and slice your mushrooms, once sliced give them a couple rough chops with your knife to make the pieces slightly smaller. Next, finely dice your garlic. Lastly, use a lemon zester to zest a tablespoon or so of lemon zest, set aside.

Reserve 1/2 cups starchy pasta water before you drain, this will help give the sauce a glossy finish and smooth consistency.

While the pasta still has a slight firmness to it, drain into a colander and set aside. Next, add a few tablespoons of olive oil to the pot your pasta was in, it should already be pretty hot, so give it a few seconds and then add in your garlic. Sauté until fragrant and then add in your mushrooms and let them soften for a couple minutes.

Add in your white wine, a dry white like Chardonnay or Chenin Blanc is best, but any white table wine will do, try and avoid sweet wines with high sugar content (Moscato, Pinot Grigio etc) and let simmer a minute or so until the alcohol can burn off, once you’ve let it simmer, give a few generous squeezes of your lemon. Next add your pasta back in and combine with your reserved pasta water and arugula. Your heat should be on medium high, continually toss the pasta gently so it can finish cooking in the sauce, really absorbing all the flavors. To finish, season with salt and (lots) of pepper, (I also like to use a bit of fresh ground lemon pepper from Trader Joe’s) and lemon zest.

Spoon your pasta into bowls and top with a generous amount of grated pecorino or parmesan (don’t skip this step, you’ll regret it!) A bit of fresh parsley also compliments this dish well if you have it on hand.

Enjoy

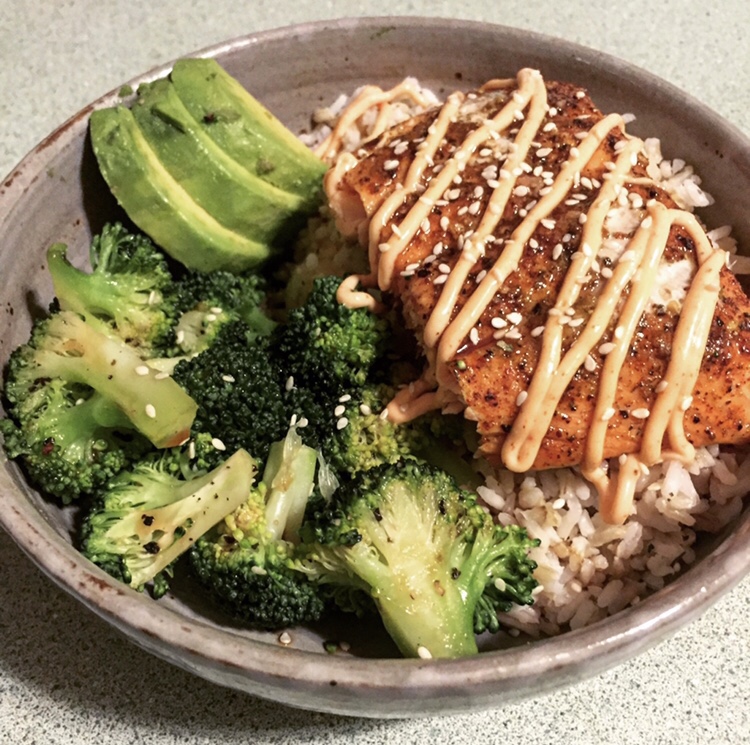
Salmon Teriyaki Bowls

If you went to UWEC like I did, you probably have fond memories of the chicken teriyaki bowls from Davie’s Student Center. I’ve taken inspiration from and adapted this recipe to recreate those bowls at home.

INGREDIENTS: (Serves 1-2 ppl)

  • 1 cup rice (I prefer white, jasmine or basmati but any kind will work)
  • 1 avocado
  • 1/2 cup mayo
  • 3 tbsp Sriracha sauce
  • Sesame seeds (white or black)
  • 5-7 ounces salmon (pre-frozen filets work too)
  • 2 cups broccoli florets
  • 1 tsp fish sauce
  • 1/4 cup soy sauce
  • 1 tbsp oyster sauce
  • 1 tbsp brown sugar

Cooking Instructions:

To start, cook your rice according to the packaging. Once it’s fully cooked and fluffy, keep the lid on the pot and set aside so it stays warm while you prepare the rest of your ingredients.

Preheat your oven to 400 degrees. While it’s heating up, take your salmon filet and brush it with a light coat of olive oil. Season with salt/pepper, crushed red pepper, garlic salt, onion powder, ground ginger and garlic salt. Once your oven is preheated, place it on the top rack for about 12 minutes or until it easily flakes away with a fork and the inner most part of the filet is opaque.

While your salmon is baking, chop up a fresh head of broccoli into medium sized florets, or measure out about two cups if you’re using frozen. I like to boil my florets for about 3 minutes and then saute in a hot skillet with a bit of oil for another couple minutes so they have a slightly crispy texture.

Next mix up your teriyaki sauce (you can definitely use bottled sauce if you have it for simplicity) combine soy, fish, and oyster sauces into a small bowl along with your brown sugar, a bit of pepper, and a pinch of red pepper flakes. Microwave it for a few seconds so the brown sugar can melt. Give it a quick wisk and adjust sweetness/spiciness to your preference. (I will sometimes add a bit of honey or agave nectar for more sweetness and a bit of rice vinegar for tanginess)

Lastly mix your mayo and Sriracha together and spoon into a ziplock bag.

Assemble your bowls with the rice, broccoli, and salmon. Drizzle with your teriyaki sauce and spicy mayo (make a small snip to the corner of the bag for a make shift piping bag for easy drizzling) top with sesame seeds.

Sit back and pretend you’re people watching instead of studying in Davies 😉 ENJOY!

Tuscan Minestrone Soup

This soup is hearty, comforting and uses mostly freezer/pantry items so you don’t need to make a special grocery tip. Veggies in this recipe can easily be opted out for what you have on hand or what’s in season. Enjoy

INGREDIENTS:

  • -32 ounces veggie stock (chicken or beef work if that’s what you have)
  • 1 can red kidney beans
  • 1 can diced tomatoes
  • 2 carrots
  • 1 small onion
  • 4 celery stalks
  • 1 zucchini
  • 2-3 cloves garlic
  • 1 cup frozen green beans
  • 2 cups chopped kale (or fresh/frozen spinach)
  • 1 1/2 cups dry orzo (any pasta works)

SPICES: onion salt, oregano, basil, paprika, crushed red pepper, bay leaves

Cooking Instructions:

To start, chop up your onions, carrot and celery into small pieces and saute with olive oil in the bottom of your stock pot. Let them soften for about 5-7 minutes, then add in your garlic and saute until fragrant.

Next add in your stock of choice, can of tomatoes, 2-3 bay leaves, and salt and pepper to season. (I like my soups with a lot of broth so I usually add in more stock.) Let the veggies simmer for another 5 minutes before adding your chopped zucchini to the mixture.

Add in your spices including a bit more salt and pepper, I like to flavor things up quite a bit but I’d recommend about 2 tsp of each seasoning, or eyeball it and taste as you go. Let the mixture simmer for another 5 min.

Now add in your green beans, kidney beans and orzo to the pot. Let this cook until the pasta is al dente (approx 8 minutes for orzo) at the last two minutes add in your kale or spinach.

Serve with fresh or shaker parmesan cheese and fresh herbs such as basil, oregano or parsley if you have them. Remove the bay leaves before serving.

Enjoy!

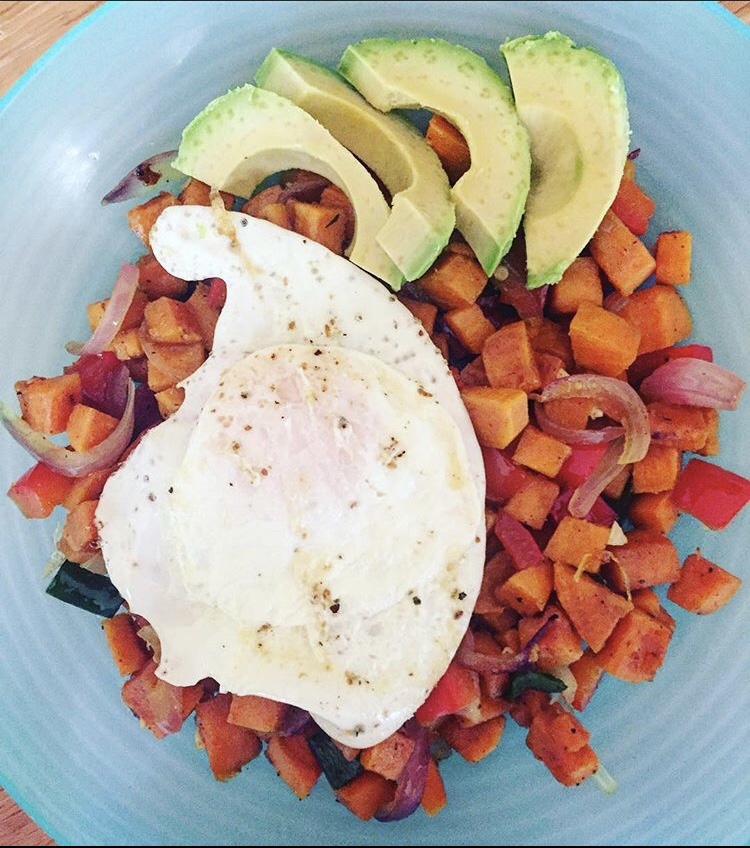
Sweet Potato Breakfast Hash

Okay, I’ve been making this dish pretty consistently since first developing it back in college. It’s easier than it looks, hella versatile, and actually pretty good for you. I’ll add in easy substitutes/suggestions to make it unique to your preferences, but bottom line — it’s a stunna breakfast dish weather you’re eating it on your work commute or bringing it to a brunch get together.

Ingredients:

  • 2 large sweet potatoes/yams
  • 1 onion (any variety works)
  • 1 bell pepper (any color, I like red for color)
  • 3 handfuls kale or spinach
  • 2 cloves garlic
  • 1 tsp red pepper flakes
  • 1 tsp curry powder
  • 1 tsp chile powder
  • olive oil (we’ll add as we go so)

Carefully peel away the skin from both sweet potatoes and cut them into small cubes. Do the same with your bell pepper and onion (I prefer to cut the onion into julienne pieces.

Rinse your spinach or kale and give it a rough chop, kale needs a bit more chopping than spinach if that’s what you’re using since it’s thicker and will take longer to soften in your skillet.

I like to use a cast iron skillet for this dish (ever since figuring out how to properly care for it, it’s my go-to skillet.)

In a hot cast iron skillet, add in approx 2 tbsp olive oil and when hot, incorporate your diced sweet potatoes. They are a fairly dense root veggie so they take a while to soften, keep stirring them gently once in a while so they don’t stick and let them soften for about 15 minutes. If you find them sticking to the pan, add in a bit more oil. Next add in your bell pepper, onion, and garlic.

Next add in your curry powder, chile powder, onion powder to taste. Add in more spice if you like, obviously. Salt and pepper to taste.

Lastly,I like to crack an egg or two over the skillet and cover until it cooks thoroughly. An easier way is to use a separate skillet and cook your over easy eggs, then flip them on top of your sweet potato skillet. Omit the eggs if you’re vegan, and enjoy!

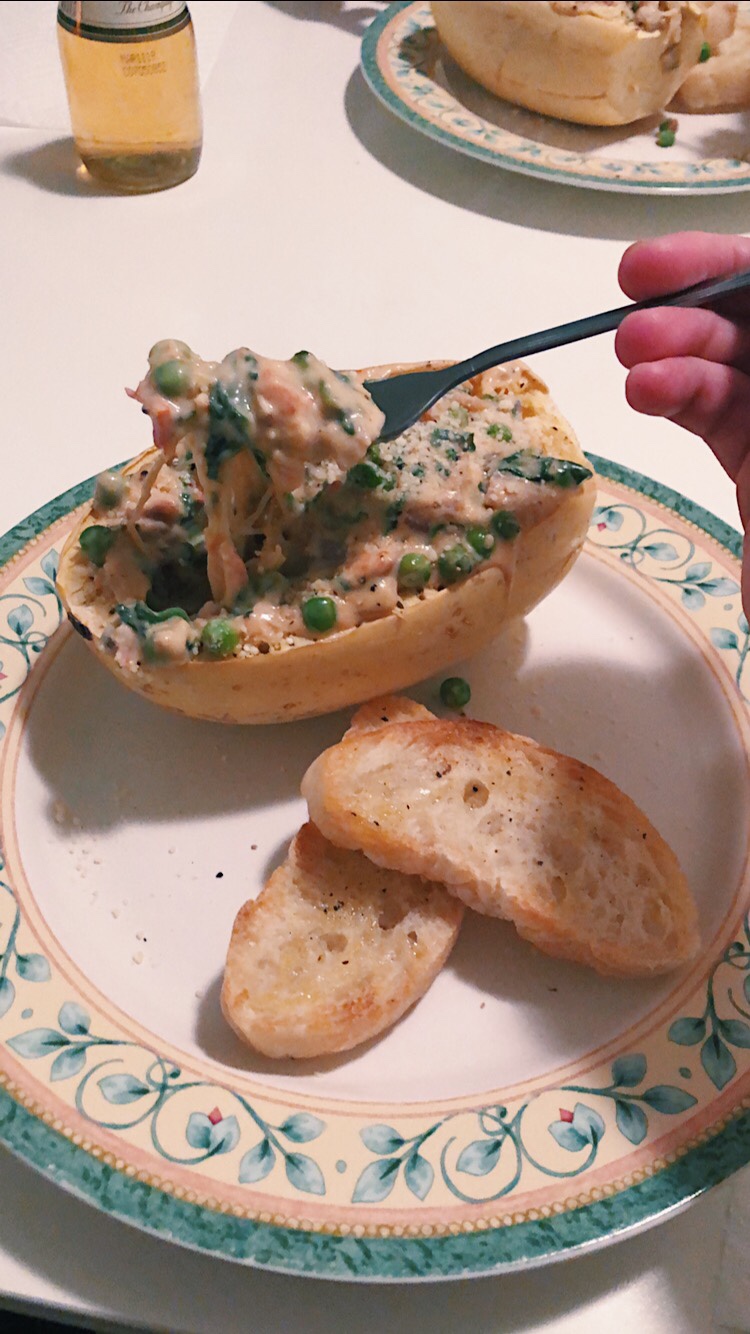
Spaghetti Squash ‘Carbonara’

The Italians perfected this decadent and creamy pasta dish, there’s no doubt about that. In this lighter version, I use the ever abundant fall staple (spaghetti squash) and tweak the sauce recipe just a bit so it’s easy while still incorporating the infamous flavors Italians have been enjoying for years. Eat your gluten-free heart out.

INGREDIENTS:

  • 1 large spaghetti squash
  • 1 ½ cups heavy cream
  • 1 cup whole milk or half and half
  • 1 cup fresh grated parmesan cheese
  • 2 tbsp olive oil
  • 4-6 strips thick cut bacon
  • 1 cup frozen peas
  • 3 cloves garlic
  • 1 tsp red pepper flakes
  • 1 tsp onion powder
  • 1 tsp dried oregano
  • Fresh parsley for garnish (optional)

Cooking Instructions:

Preheat your oven to 400 degrees. Grab a sharp knife and cut through your squash lengthwise (the outer skin is tough so make sure your knife is sharp and have some patience) Place on a lightly oiled baking sheet and brush with additional olive oil, sprinkle with salt and pepper. Place your squash oiled side up in the oven for approx. 20 min. Turn over onto its other side and cook for an additional 20 min, or until fork tender and shreds easily. You’ll assemble the sauce while the squash roasts. 

While your squash is in the oven, start preparing your sauce by finely chopping your garlic cloves. Next, roughly chop your bacon into evenly sized pieces. 

Heat a large skillet on medium-high heat, once ready add in your bacon pieces. Sauté gently and allow them to get golden brown. Once you see them turning a nice golden color, add in your garlic and sauté for an additional minute or so. Next, add the heavy cream and milk to your skillet, gently stirring to combine the garlic and bacon. Bring the mixture to a gentle simmer and let thicken up for about 5 minutes, stirring once in awhile so it doesn’t stick to the pan. 

Once your cream sauce is thickened up and bubbling, add in your parmesan, peas, and season with salt/pepper, red pepper flakes, onion powder and oregano. (If you find that your sauce is too thick at this point, add in a little bit of water, chicken stock, or more milk to help thin it out a bit.) Let the mixture gently simmer for another minute (just enough for the peas to cook, which doesn’t take long at all)

At this point your squash should be done roasting, remove from the oven and take a fork to the tender inside and gently pull up on the flesh, creating noodle like strands. Once your squash is nicely shredded, ladle your carbonara sauce into the squash bowls and top with fresh parsley and extra parmesan. Enjoy!

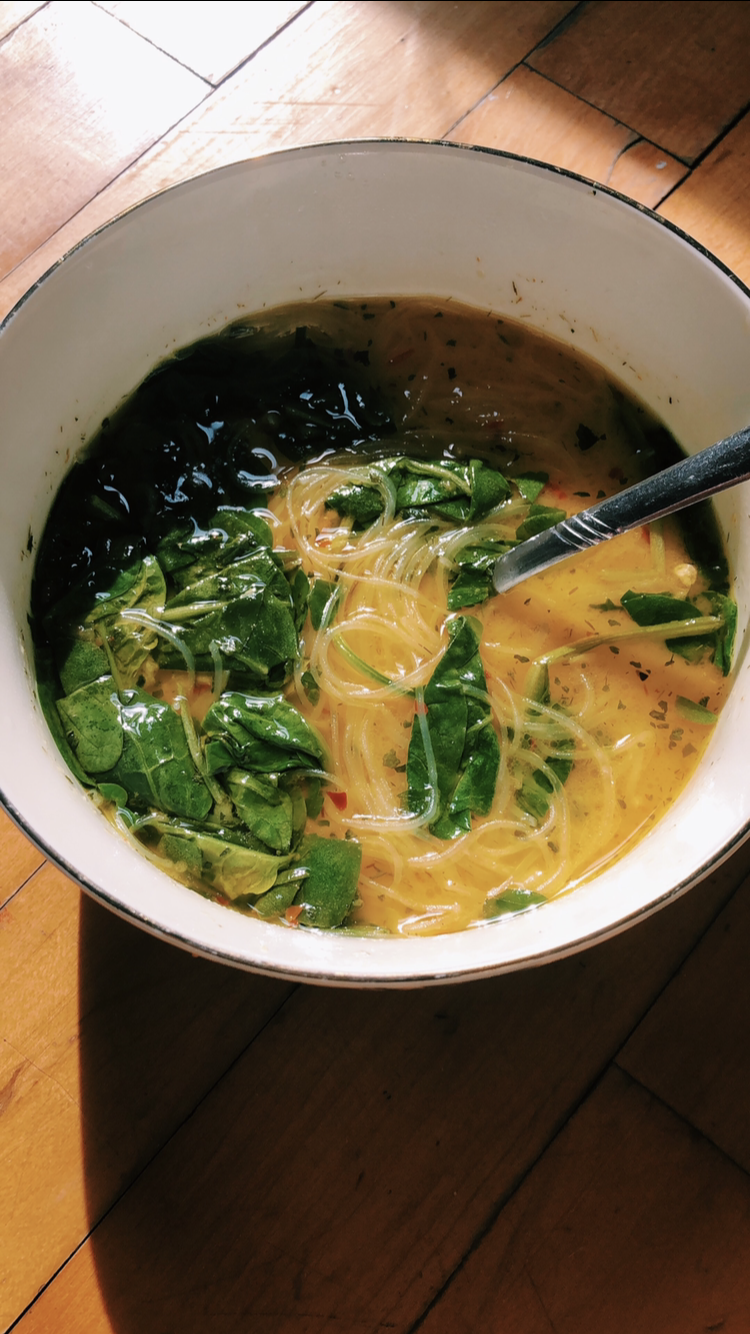
Thai Shrimp & Curry Noodle Soup

Unlike most soups, this one doesn’t take hours to simmer and develop flavor. It’s quick, and like most Thai-inspired cuisine, it’s a lil’ sweet, a lil’ spicy, a lil’ tangy and it’s complex flavor profile will have your friends thinking you worked way harder at it than you did. ENJOY

Ingredients:

  • ½ pound tiger shrimp, rinsed and cut into small pieces (this variety has a nice firm texture but feel free to use any kind of shrimp, sub for chicken or omit completely)
  • 2 cans coconut milk 
  • 16 oz chicken stock
  • 1/2 package rice stick/glass noodles (the thinner the better for this recipe)
  • 1 thinly sliced jalapeno
  • 2 tbsp fresh diced ginger
  • 1/2 of a medium red onion
  • 4-5 stalks fresh lemongrass (died will work but fresh adds an unbeatable flavor)
  • 2 large cloves fresh minced garlic
  • 1 cup fresh chopped cilantro
  • 2-3 tbsp red curry paste
  • 1 tbsp fish sauce
  • 1 tbsp spoon dark soy sauce/coconut aminos (Trader Joe’s for the win) 
  • 3 tbsp fresh lime juice
  • salt and pepper to taste

(I also add a pinch of dried curry powder, turmeric and cayenne for an extra kick- all optional)

Instructions:

Grab a large soup or stock pot and add in a bit of coconut oil (any other oil works fine here) to the bottom and turn heat to medium/high.

Carefully slice your onion into thin slices, mince your garlic, and finely chop your ginger. Once hot, add in all three ingredients and gently sauté for about 5 min or until onion is softened, be careful not to burn your garlic. Next, add in chicken stock and turn up the heat a touch.

Trim away the rough white ends of the lemongrass and discard, then cut the remainder into roughly 3 equal pieces. Pound the pieces until nicely flattened in order to tenderize and loosen all the good fiber that is going to flavor your stock. Let the lemongrass simmer in the stock for about 10 min and gently remove the pieces.

Next add in both cans of coconut milk, curry paste, fish sauce, soy sauce and lime juice. Stir to combine and lightly season with salt and pepper. At this point I let the broth simmer for a few minutes and add in any additional seasonings that I like (cayenne, turmeric, miso powder etc) whatever you’re feeling, you have some creative freedom here!

Once the broth has simmered for a bit and all the flavors have had a chance to combine, add in your rice noodles and shrimp. Both the noodles and shrimp don’t take long to cook so I give them about 5-6 min to absorb all the flavors of the stock. At this point I would also add in the jalapeno. I like it to soften up a bit from it’s raw crunchy texture, but to not over cook it so it keeps it’s gorgeous bright green color. 

Once your shrimp and noodles are cooked, give it a generous stir, add in a bit more salt/ pepper and you’re done! Ladle it into bowls, top generously with fresh cilantro (bean sprouts also add a nice touch texture-wise) and enjoy 🙂

Design a site like this with WordPress.com
Get started